Introduction
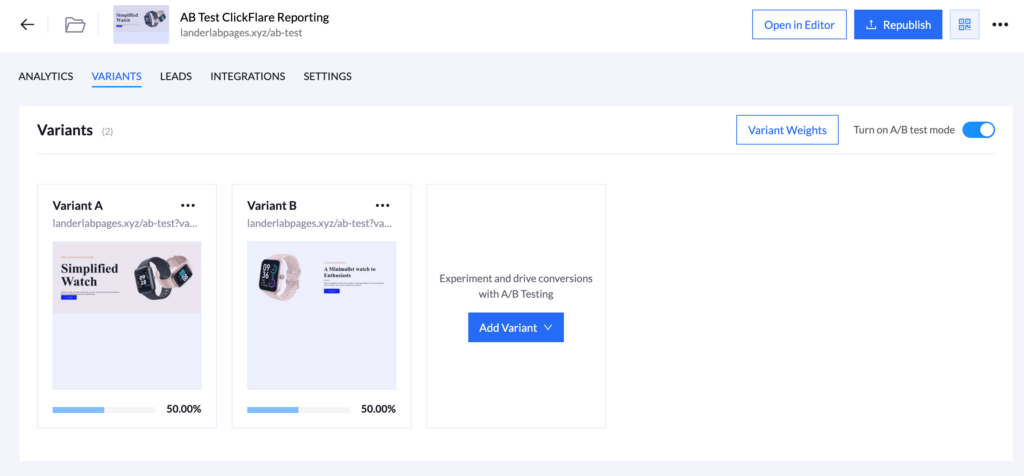
In the world of digital marketing, AB Testing is essential to successful campaigns. LanderLab is now offering a great tool to set up AB testing on server-side, using the same URL to rotate different variations. With this update, users can A/B test their landing page and cross-check results within their preferred tracker.
Why Using A/B Testing with LanderLab
Most marketers use their own tracking softwares such as ClickFlare, Voluum or Redtrack to split test landing pages and in most of the cases that’s more than enough. However, there might be cases where split testing is not possible using a tracker. Premium traffic sources do not allow redirects, final destination URL needs to be the same as the landing page URL.
Here’s where LanderLab comes in handy with its server-side A/B testing, eliminating a redirect in the flow. You can read the more details on how A/B Testing works in LanderLab by checking this article. And the best part is that LanderLab can be integrated with most modern trackers.

The concept is easy, combinating LanderLab’s A/B testing with direct tracking method offered in every tracker. Trying to cover the basics, this article is going to provide information on how to implement this setup with ClickFlare, Voluum and Redtrack.
Setting up AB Testing with ClickFlare
Using ClickFlare’s direct tracking method can provide the perfect combination for this setup. Afterall, both platforms are created and developed by the same company, so it makes sense to have a better integration using both. Here’s an article to read more about direct tracking offered in ClickFlare.
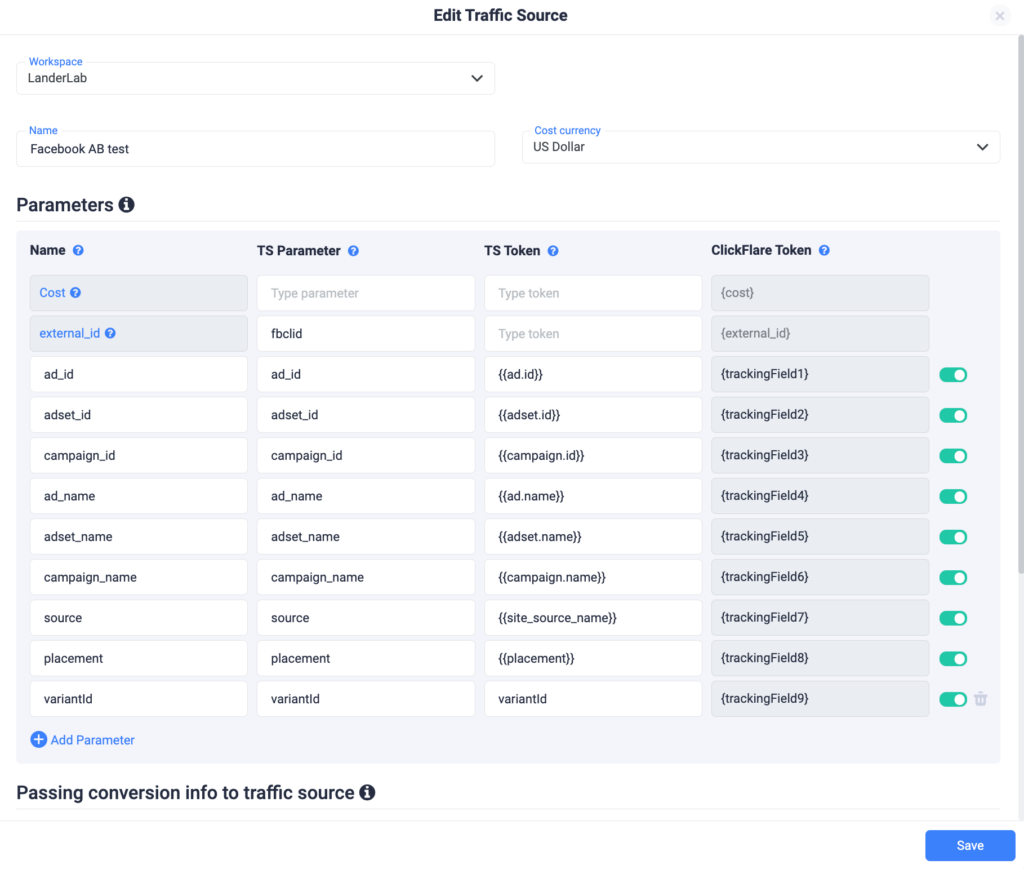
There are 2 base steps to follow when implementing this setup and the same steps can be applied to Voluum and Redtrack. The first step is going to be how to define a new tracking parameter for reporting variantID in ClickFlare.

In order to track variantID in our tracker, we will need to make some changes to the direct tracking script. The following script contains 2 variables that need to be replaced: “REPLACE_ME_CAMPAIGN_ID” and “REPLACE_ME_CUSTOM_DOMAIN”. Once ready, the whole code needs to be placed into LanderLab Settings > Custom Code > Header Section.
<script> ! function() {
"use strict";
var t = "lp_ref",
n = "cpid",
e = "lpurl",
r = "REPLACE_ME_CUSTOM_DOMAIN",
c = "(?<domain>http(?:s?)://[^/]*)".concat("/cf/click"),
a = "(?:(?:/(?<cta>[1-9][0-9]*)/?)|(?:/))?",
i = "^".concat(c).concat(a).concat("(?:$|(\\?.*))"),
o = 'javascript:window.clickflare.l="(?<original_link>'.concat(c).concat(a, '("|(\\?[^"]*"))).*'),
s = function() {
return new RegExp(i, "")
},
u = function() {
return new RegExp(o, "")
};
function l(t) {
var n = function(t) {
return t.replace(s(), (function(t) {
for (var n = [], e = 1; e < arguments.length; e++) n[e - 1] = arguments[e];
var c = n[n.length - 1].domain;
return t.replace(c, r)
}))
}(t);
return 'javascript:window.clickflare.l="'.concat(n, '"; void 0;')
}
function f(t, n) {
if (n && t && n.apply(document, [t]), /loaded|interactive|complete/.test(document.readyState))
for (var e = 0, r = document.links.length; e < r; e++)
if (s().test(document.links[e].href)) {
var c = document.links[e];
window.clickflare.links_replaced.has(c) || (c.href = l(c.href), window.clickflare.links_replaced.add(c))
}
}! function(c, a) {
var i = document.onreadystatechange;
window.clickflare || (window.clickflare = {
listeners: {},
customParams: {},
links_replaced: new Set,
addEventListener: function(t, n) {
var e = this.listeners[t] || [];
e.includes(n) || e.push(n), this.listeners[t] = e
},
dispatchEvent: function(t, n) {
n && (this.customParams[t] = n), (this.listeners[t] || []).forEach((function(t) {
return t(n)
}))
},
push: function(t, n) {
n && (this.customParams[t] = n), (this.listeners[t] || []).forEach((function(t) {
return t(n)
}))
}
}, document.onreadystatechange = function(t) {
return f(t, i)
}, f(null, i), setTimeout((function() {
! function(c, a) {
var i, o = function(c, a) {
var i = new URL("".concat(r).concat(c)),
o = "{",
s = o + o;
a.startsWith(s) || i.searchParams.set(n, a);
return i.searchParams.append(t, document.referrer), i.searchParams.append(e, location.href), i.searchParams.append("variantId", window.LL_VARIANT_ID), i.searchParams.append("lpt", document.title), i.searchParams.append("t", (new Date).getTime().toString()), i.toString()
}(c, a),
s = document.createElement("script"),
l = document.scripts[0];
s.async = 1, s.src = o, s.onerror = function() {
! function() {
for (var t = function(t, n) {
var e = document.links[t];
u().test(e.href) && setTimeout((function() {
e && e.setAttribute("href", function(t) {
var n = t.match(u());
if (n) {
var e = (n.groups || {}).original_link;
return e ? e.slice(0, -1) : t
}
return t
}(e.href))
}))
}, n = 0, e = document.links.length; n < e; n++) t(n)
}()
}, null === (i = l.parentNode) || void 0 === i || i.insertBefore(s, l)
}(c, a)
})))
}("".concat("/cf/tags", "/").concat(new URL(window.location.href).searchParams.get("cftmid") || "{{__CONTAINER_ID__}}"), new URL(window.location.href).searchParams.get(n) || "REPLACE_ME_CAMPAIGN_ID")
}(); </script>Setting up AB Testing with Voluum
Voluum is among the oldest trackers in affiliate marketing and it still has a large part of the market. We will still rely on direct tracking to report variantID into this tracker, using the same method as previously.

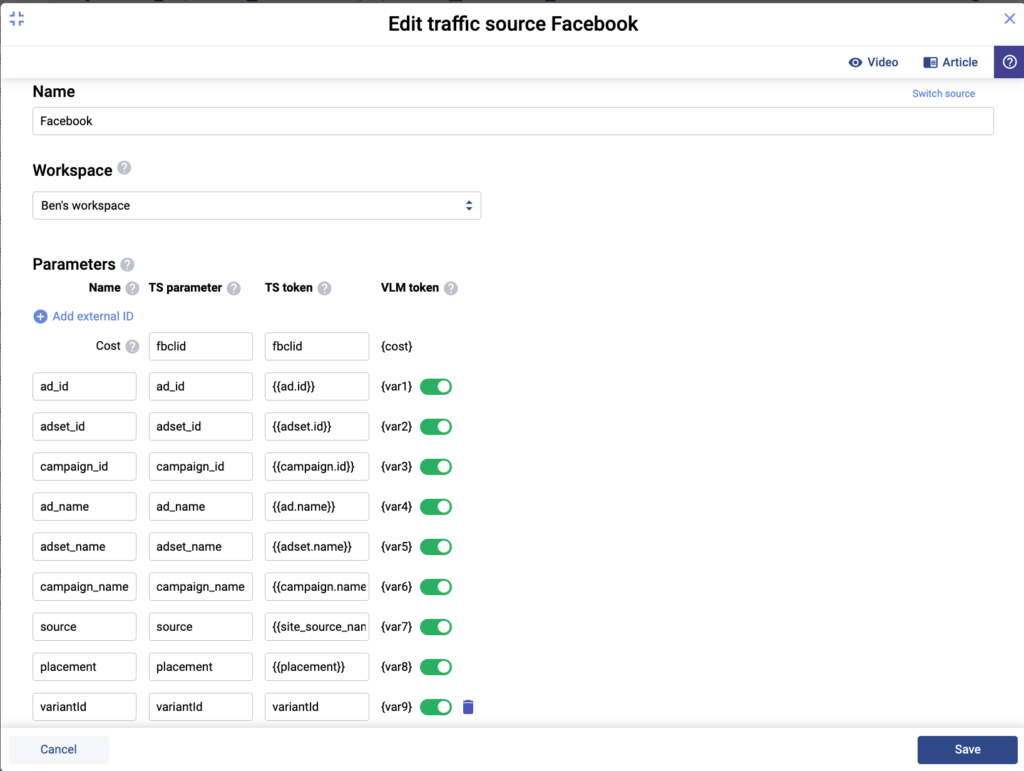
VariantID is added into the traffic source template at the bottom, but it does not really matter in which order it is being inserted. To be aligned with the same terminology, the same 2 variables need to be replaced: “REPLACE_ME_CAMPAIGN_ID” and “REPLACE_ME_CUSTOM_DOMAIN”. Copy Paste the following code into LanderLab’s custom code section, so the setup can be completed.
<style>.dtpcnt{opacity: 0;}</style>
<script>
(function(d, c, k, l, r, t, g, u, A, e, m, v, B, a, n, p, h, q, w, D, x) {
function y() { for (var f = c.querySelectorAll(".dtpcnt"), b = 0, a = f.length; b < a; b++) f[b][u] = f[b][u].replace(/(^|\s+)dtpcnt($|\s+)/g, "") }
function C(a, b, d, e) { var f = new Date;
f.setTime(f.getTime() + (e || 864E5));
c.cookie = a + "=" + b + "; " + d + "samesite=Strict; expires=" + f.toGMTString() + "; path=/";
k.setItem(a, b);
k.setItem(a + "-expires", f.getTime()) }
function z(a) {
var b = c.cookie.match(new RegExp("(^| )" + a + "=([^;]+)"));
return b ? b.pop() : k.getItem(a + "-expires") && +k.getItem(a +
"-expires") > (new Date).getTime() ? k.getItem(a) : null
}
x = "https:" === d.location.protocol ? "secure; " : "";
d[e] || (d[e] = function() {
(d[e].q = d[e].q || []).push(arguments) }, p = c[r], c[r] = function() { p && p.apply(this, arguments); if (d[e] && !d[e].hasOwnProperty("params") && /loaded|interactive|complete/.test(c.readyState))
for (; a = c[t][m++];) /\/?click\/?($|(\/[0-9]+)?$)/.test(a.pathname) && (a[g] = "javascrip" + d.postMessage.toString().slice(4, 5) + ":" + e + '.l="' + a[g] + '",void 0') }, setTimeout(function() {
(q = /[?&]cpid(=([^&#]*)|&|#|$)/.exec(d.location.href)) &&
q[2] && (h = q[2], w = z("vl-" + h));
var f = z("vl-cep"),
b = location[g];
if ("savedCep" === B && f && (!h || "undefined" === typeof h) && 0 > b.indexOf("cep=")) { var e = -1 < b.indexOf("?") ? "&" : "?";
b += e + f } a = c.createElement("script");
n = c.scripts[0];
a.defer = 1;
a.src = v + (-1 === v.indexOf("?") ? "?" : "&") + "lpref=" + l(c.referrer) + "&lpurl=" + l(b) + "&lpt=" + l(c.title) + "&vtm=" + (new Date).getTime() + (w ? "&uw=no" : "") + "&variantId=" + window.LL_VARIANT_ID ;
a[A] = function() { for (m = 0; a = c[t][m++];) /dtpCallback\.l/.test(a[g]) && (a[g] = decodeURIComponent(a[g]).match(/dtpCallback\.l="([^"]+)/)[1]);
y() };
n.parentNode.insertBefore(a, n);
h && C("vl-" + h, "1", x)
}, 0), setTimeout(y, 7E3))
})(window, document, localStorage, encodeURIComponent, "onreadystatechange", "links", "href", "className", "onerror", "dtpCallback", 0, "REPLACE_ME_CUSTOM_DOMAIN/d/REPLACE_ME_CAMPAIGN_ID.js", "savedCep");
</script>
<noscript>
<link href="REPLACE_ME_CUSTOM_DOMAIN/d/REPLACE_ME_CAMPAIGN_ID.js?noscript=true&lpurl=" rel="stylesheet" /></noscript>Setting up AB Testing with Redtrack
Last but not least, we’re going to implement the same setup for Redtrack. This tracker takes a good % of the market and it offers the same features as ClickFlare and Voluum.
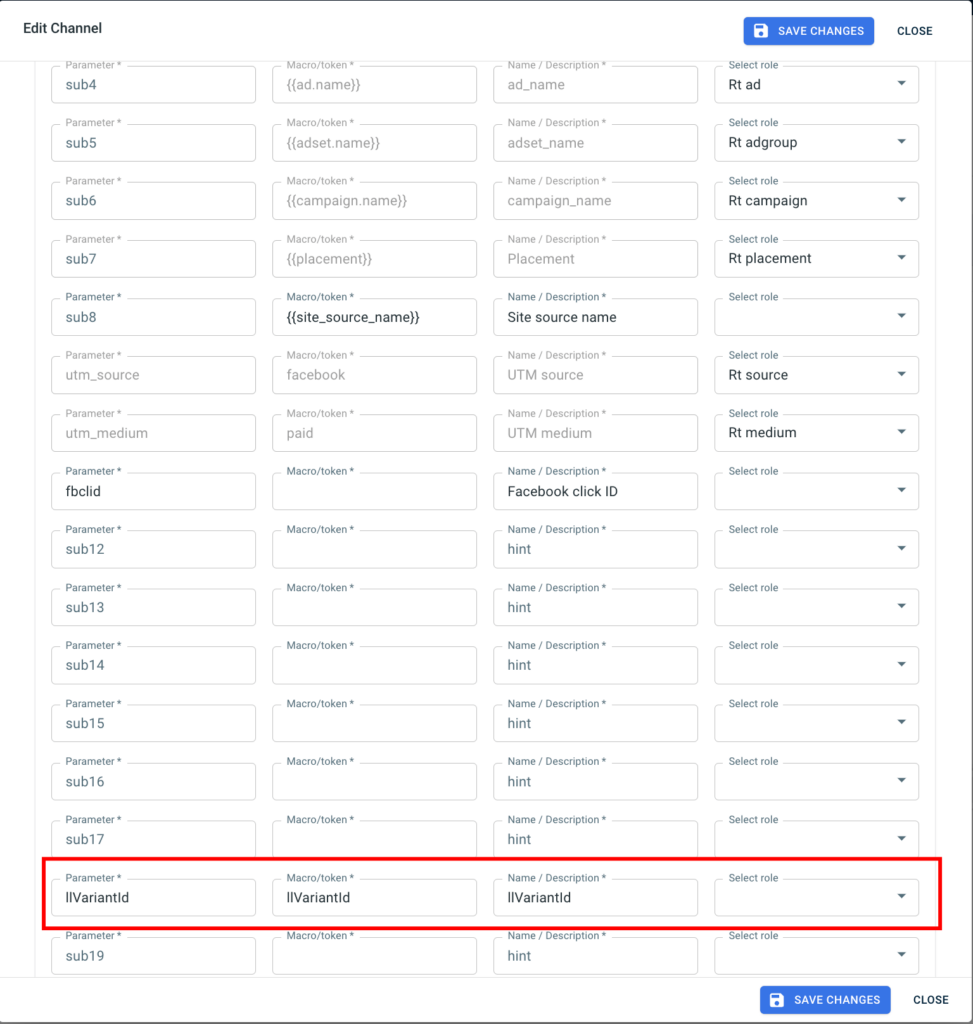
But compared to the other 2 trackers, variantID needs to be allocated into a specific token since some of them are dedicated to system tokens. In this example, variantID has been allocated into sub18 and it will be reflected into the direct tracking script as well.

“REPLACE_ME_CAMPAIGN_ID” and “REPLACE_ME_CUSTOM_DOMAIN” need to be replaced and the code is ready to be used in LanderLab.
<script>
function getCookie(name) {
var value = "; " + document.cookie;
var parts = value.split("; " + name + "=");
if (parts.length === 2) {
return parts.pop().split(";").shift();
}
}
var trackerURL = "REPLACE_ME_CUSTOM_DOMAIN";
var campaignID = "REPLACE_ME_CAMPAIGN_ID";
var cachebuster = Math.round(new Date().getTime() / 1000);
var rtkClickID;
var rtkfbp = getCookie('_fbp') || '';
var rtkfbc = getCookie('_fbc') || '';
var LL_VARIANT_ID = window.LL_VARIANT_ID;
var locSearch = window.location.search;
var urlParams = new URLSearchParams(locSearch);
var pixelParams = "&" + locSearch.substr(1) + "&sub18=" + LL_VARIANT_ID + "&sub19=" + rtkfbp + "&sub20=" + rtkfbc
if (campaignID == "") {
campaignID = urlParams.get('rtkcmpid')
}
var initialSrc = "https://"+ trackerURL + "/" + campaignID + "?format=json";
function stripTrailingSlash(str) {
return str.replace(/\/$/, "");
}
var rawData;
function fixHrefWithClick(
_rawData,
_cachebuster,
_rtkClickID
) {
document.querySelectorAll('a').forEach(function(el) {
if (el.href.indexOf(trackerURL + "/click") > -1) {
if (el.href.indexOf('?') > -1) {
el.href = stripTrailingSlash(el.href) + "&clickid=" + (_rtkClickID || _rawData.clickid) + "&rtkck=" + _cachebuster
} else {
el.href = stripTrailingSlash(el.href) + "?clickid=" + (_rtkClickID || _rawData.clickid) + "&rtkck=" + _cachebuster
}
}
if (el.href.indexOf("clickid={clickid}") > -1) {
el.href = el.href.replace(/{clickid}/, _rawData.clickid) + "&rtkck=" + _cachebuster;
}
});
}
setTimeout(function() {
if (!urlParams.get('rtkcid')) {
xhr = new XMLHttpRequest;
xhr.onreadystatechange = function() {
if (xhr.readyState == 4 && xhr.status == 200) {
rawData = JSON.parse(xhr.responseText);
rtkClickID = rawData.clickid
setCookie();
// fixHrefWithClick(rawData, cachebuster)
document.querySelectorAll('a').forEach(function(el) {
if (el.href.indexOf(trackerURL + "/click") > -1) {
if (el.href.indexOf('?') > -1) {
el.href = stripTrailingSlash(el.href) + "&clickid=" + rawData.clickid + "&rtkck=" + cachebuster
} else {
el.href = stripTrailingSlash(el.href) + "?clickid=" + rawData.clickid + "&rtkck=" + cachebuster
}
}
if (el.href.indexOf("clickid={clickid}") > -1) {
el.href = el.href.replace(/{clickid}/, rawData.clickid) + "&rtkck=" + cachebuster;
}
});
xhrr = new XMLHttpRequest;
xhrr.open("GET", "https://"+ trackerURL +"/view?clickid=" + rawData.clickid)
xhrr.send();
}
}
xhr.open("GET", initialSrc + pixelParams)
xhr.send();
} else {
rtkClickID = urlParams.get('rtkcid')
setCookie();
xhrTrack = new XMLHttpRequest;
xhrTrack.open("GET", "https://"+trackerURL+"/view?clickid=" + rtkClickID)
xhrTrack.send();
// fixHrefWithClick(rawData, cachebuster, rtkClickID)
document.querySelectorAll('a').forEach(function(el) {
if (el.href.indexOf(trackerURL+ "/click") > -1) {
if (el.href.indexOf('?') > -1) {
el.href = stripTrailingSlash(el.href) + "&clickid=" + rtkClickID + "&rtkck=" + cachebuster
} else {
el.href = stripTrailingSlash(el.href) + "?clickid=" + rtkClickID + "&rtkck=" + cachebuster
}
}
if (el.href.indexOf("clickid={clickid}") > -1) {
el.href = el.href.replace(/{clickid}/, rawData.clickid) + "&rtkck=" + cachebuster;
}
});
}
}, 5e1)
function setCookie() {
var cookieName = "rtkclickid-store",
cookieValue = rtkClickID,
expirationTime = 86400 * 30 * 1000,
date = new Date(),
dateTimeNow = date.getTime();
date.setTime(dateTimeNow + expirationTime);
var date = date.toUTCString();
document.cookie = cookieName + "=" + cookieValue + "; expires=" + date + "; path=/;"
}
</script>Conclusion
With data now reported in your tracker, it can be actually measured how many events is a specific variant bringing in. Once you know the winning variant, just end the A/B testing and set it as main variant. Start split testing today with LanderLab while eliminating the risk of getting banned.


